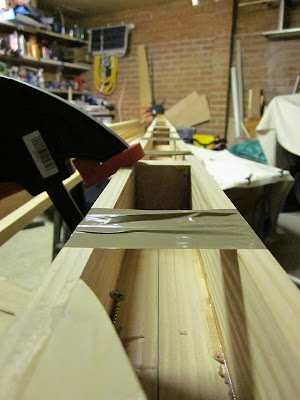
Friday night was spent marking out the narrow staves for the hollow Douglass Fir mast, these were then planed down as necessary to give the mast its taper. The instructions suggest doing each stave individually but as the planks I have are nice and straight I planed them down together giving me two identical staves and lots of shavings to sweep up. Some time on Saturday allowed me to make the blocks that are internal to the mast and hold the staves apart at the correct distance, one long block at the bottom with small spacers running up the inside of the mast. The spacer blocks were all made from lightweight Cedar.
Finally the time came to glue it all together so I applied packing tape to one of the wide staves to act as a support for the first gluing operation. The ladder of narrow staves and blocks were laid out and clamps were all found before the epoxy was mixed up and thickened. Starting at the bottom of the mast the epoxy was applied and then clamped before moving from one spacer block to the next until the top of the mast had been glued and clamped.
As I was in an “epoxying” mood and it was reasonably warm (for the time of year) I decided to glue up the cedar blank that the daggerboard will be made from. This was 7 lengths of Cedar with an length of Oak along the leading and trailing edges. I fortunately have a nice flat table that makes a good platform for this so it was covered in packing tape before the wood was glued and clamped to the table.
I had a few hours available on Sunday so started by inspecting the mast and daggerboard now that the epoxy had all hardened. The daggerboard blank was fine and I cleaned up the surface of the board with a plane and sandpaper. The mast also looks good but did have a slight bend toward the top, fortunately the bend was to the side and this can be corrected once the narrow staves are glued up to the wider staves so this was tackled next.
A straight line was marked along the first wide stave by using a stretched string, I was then able to use this as a base line when gluing the narrow staves to it. A lot of epoxy was needed for this job and much of this was squeezes out, a bit of a waste really but I would rather this than end up with areas with little or no glue. A lot of clamps were required to keep it all in alignment and the designers tip of using packing tape works well. There were a couple of places where I struggles to keep the mast straight so I used a few temporary screws to hold the narrow stave in position while it all set. The screws will be removed and holes filled before the final wide stave is glues in position. The final result is pretty straight mast (or at least three sides of it).


No comments:
Post a Comment