Saturday, 21 January 2012

Gunwales, inwales and knees

As per the previous posting, I have fitted the drain-tubes into the bottom of the central seat and this has connected the pre-cut limber holes.  The result is not exactly pretty but the tubes will be hidden from view and they would be difficult to fix if they came loose once the top has been fitted to the seat.


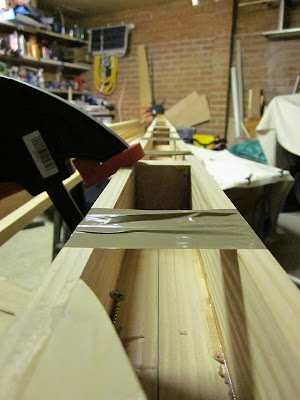
As you can see in the picture below I have also fitted the inner-gunwale to both sides and today the oak capping has been glued in place on the starboard side.   The lengths of oak supplied were only about 4m long so I had to scarf them into longer lengths, it is the first time I have done a scarf joint and while not perfect I have put the best side on the outside and it doesn’t look bad at all.  I cut the scarfs by hand using a pull saw but I think if scarfing thin strips of wood again I would use a router and straight guide for greater accuracy.


While the epoxy on the starboard side was starting to cure I decided to have a crack at the stern knees that help to tie the top of the transom into the hull sides.  To some extent I have been putting this off for a time when I wouldn’t be rushed as there are a lot of different angles to cut to get a good fit.  The plans show a simple triangle but I I fancied something a little more curvaceous.   In the end I finished with a pair of good knees that are almost ready to fit, one of which is shown below.  The fit is pretty good and thickened epoxy will fill any small gaps.   I will fit these slightly proud of the hull sides (as with the gunwale and inwale) and then plane or use the belt sander to trim back to size.  I have yet to make the bow knee but that may be a job for tomorrow.

Thursday, 5 January 2012

Happy New Year

Christmas has come and gone and we find ourselves in another new year, I hope it is a healthy, happy and prosperous one for those reading this.   I certainly hope it is a healthy one in this household as it started for me with a serious dose of “turbo man-flu”, I gather it can be terminal but having been struck down since boxing day I am finally (on the 5th Jan) starting to pull myself together.  If you are not familiar with man-flu you need to see this for an explanation http://www.youtube.com/watch?v=VbmbMSrsZVQ


Since the last update the front and rear buoyancy tank tops have been glued in position and a fillet of thickened epoxy run around the edges, it is all starting to look very smart although I have yet to cut the hole for the mast but will probably do this with bearing guided strait router bit so that it is cut back flush to the structure underneath.  I have already run the router along the inside edge of both tanks with a radius cutter to reduce the number of sharp edges to fall against in the boat, the middle seat will get the same treatment when complete.


The side frames for bulkheads for BH2 and BH4 have been trimmed and glued into position.  The side frames for BH2 required a lot of shaping to fit correctly and I was surprised by the vertical curvature (if that is the correct way of describing it) in the plywood hull side.  The tops of the side frames have all been trimmed back so that they are the same size at the inwale spacers so the inwale is probably next to go on.


BH2.2, that is the new one I have added to be the front of the middle seat has had some WRC framing added before being epoxy coated wet-on-tack.  Finally these have been glued into position in hull.   Next steps will be to fit the draining tubes and then I think I need to buy another sheep of Plywood to make and fit the seat top, annoyingly I would probably have enough spare if I had been a bit more cunning in my marking and cutting out of all the various pieces.


On a final note I have bought some really lovely stainless steel rowlocks on ebay because I just couldn’t face putting cheapo plastic rowlocks on the boat after the work put in. 

Tuesday, 20 December 2011

Tank tops, rudder case and the middle seat.

Using up annual leave from work allowed me to have a long weekend so there was an opportunity to get out into the (very cold) garage for a bit of GIS building.


All the inwale spacers are now glued in place and I could now complete the inner and outer gunwale but will hold off until the rest of the inside is complete.  The seat/tank tops for the bow and stern have been cut to shape.   The stern seat top was easy but the bow took a lot of shaping to be a good fit.   I ended up using some scrap plywood to make a template for each side of the tank top (following the curve of the hull) before transposing this shape onto the more expensive okoume marine ply.   Both tank tops now have an epoxy coating so are ready to fit.  Here is a young skipper checking out the toy-storage in the bow


Before the aft tank can be sealed down I need to add a wooden pad to the inside of the transom for the rudder fixings to screw into, to know where this should be located I needed a rudder stock to offer up so this was the next job.   The parts had been pre-cut some time ago and then put to one side as I was waiting to order the Seasure Pintle/gudgeon sets and some other stainless fittings.   The finished tiller and rudderstock is shown below after epoxy coating.


I am changing the design a little in regard to the middle seat, the plans show a single bulkhead and simple seat with open storage below.   I am going to enlarge this seat and make it enclosed for two reasons, this will reduce the amount of water in the boat after a capsize and provide some additional storage if required.   It will also allow me to add some weight to the boat in the middle if I wish as there may be circumstances when I want to make the Goat more docile to sail and adding weight will help if I am sailing on my own.   The middle seat it being extended forward so that it is approx. 500mm wide and this will allow me to fit up to 36litres of water ballast (24 x 1.5L water bottles = 36KG).  Enclosing the middle seat causes a problem though, after a capsize both the forward and main part of the hull will need to be bailed (with a bucket most likely) so I am adding some drain holes, joined by a tube, so that as the Goat is bailed any water in the front part of the boat will (should!) run aft.  The pic below shows the half-bulkheads cut out and in place but they have not been fixed yet.   The drain tube is it literally that, a domestic waste water tube that is cut in half and will be bonded in place.


Wednesday, 14 December 2011

Gunwale and Inwale

Lack of time and the cold weather have slowed progress but I have managed to shape and fit the first part of the outer gunwale that is doug-fir, as you can see in the pic I have also started fitting the inwale spacers that are cedar.  The gunwale will be finished with a thin piece of American white oak so it should be resistant to the inevitable knocks and scrapes.

Wednesday, 16 November 2011

I have not had so much time on the GIS build in the last couple of weeks but have managed to fit the supporting structure for the front and rear seat tops and also fit the mast step as shown in the pics below.  I need to mark out and cut the seat tops soon but fitting these will be my last chance to fix any twist in the hull so I will need to do some careful measuring and adjustment before gluing in place.  Last time I checked it was all looking very straight and true so fingers crossed this is still the case.

I have also fitted the daggerboard case that was built some time ago.   In order to fit this flush to BH3 I needed to cut out a section of the top framing on the forward side of BH3.   It doesn’t say anything about this in the instructions so I just made a guess that this is what was needed.   

Monday, 7 November 2011

Mast and seat supports

Before the seat/tank tops can go in they need to seat cleats fitted to the side of the hull so I have put these in over the weekend along with some of the supporting structure that is fitted on the centreline of the boat in the tanks.  In the pic below you can see the side cleats being held in place with a mixture of clamps and bits of scrap wood.  A start has been made on the outer gunwale as this needs shaping to the correct profile before fitting, I have dry clamped in place and hoping that the wood will relax into shape as this will make final fitting easier.   


I have also made the mast step and partner from Doug Fir, the partner is fitted in place while the step has been shaped to fit and epoxy coated.  It is critical to get this all fitted in the correct position on the centre-line or the Goat will be sailing faster on one tack than the other.


Finally I did a bit of shaping on the tiller, I made this some time ago but while the router was out I ran around the edges and tidied up some of the glue before it was epoxy coated. 


This weekend was the first chance I have had to use the PEC epoxy having made the change from West.   I have found that it is a little thicker that West but responds well to some gentle warming and this makes it considerably less viscous.   Working time is much longer, this is both good and bad so I will contact PEC to see if there is a faster version of the hardener component.  Once set there was a little blushing on the surface by much less than the West, this is a little disappointing as I was hoping to move to a blush-free epoxy as much as possible.  So I may not have solved the blushing problem but at least it is a good bit cheaper than West so I can live with that for now.

Monday, 31 October 2011

Looking goat shaped

The bottom of the hull has been epoxied in place and then tripped to size.   A radius has been planed and sanded to the chine between hull sides and bottom and a layer of glass tape epoxied in place, not the neatest glassing job I have done but it will be cleaned up and painted over so not the end of the world.   I also used up the last of the West epoxy on the bottom and am not going to move to another brand that (hopefully) doesn’t suffer the extensive amine blush that West seems to leave behind after curing.

The pic blow shows the hull now turned the correct way up and I plan to finish the inside seating, structure and in/outwales before flipping back over to finish the bottom.  It’s all looking rather boat shaped.


Wednesday, 12 October 2011

The goat goes 3D

It has been almost a month since updating this, partly down to work and partly down to not doing much building.  However there has been some progress over the past few weeks as follows.

The daggerboard case had been completed, the front and back of the slot have been lined with thick rubber to protect the daggerboard from damage after the inevitable groundings.  With the case sealed up the outside has had three coats of epoxy to match the rest of the hull.

The inner gunwales on the Goat are set on blocks of wood that not only create a stiffer structure but also allow water to drain out easily when the hull is flipped over.  While they won’t be fitted for a while I have made up all the little blocks from Cedar, rounded the ends to make them look nice and epoxied the end grain.  Two of the blocks are a little larger and will be fitted 300mm aft of the seat to accommodate the rowlocks.

Lastly, the Goat had finally gone 3D.  The hull was dry-fitted together initially to make sure it all looks good and fair.  The chinelogs needed trimming where they come together at the bow but this appears to be a common fix that is needed to stop the ply pulling itself apart.  Next was the messy and sticky job of gluing it all together, this was started at the stem and I worked aft pulling out and then refitting each bulkhead in turn finishing at the transom.  When completed the hull sides had a nice fair curve and having taken some measurements it was all strait and square – Amazing!

Lastly I have added a small piece of oak to the outer stem as this area is likely to suffer knocks and the oak will take far more abuse that the Plywood and cedar stem.  Not it’s fitted I’m tempted to leave the oak stem on show as it will match the oak trim on the outer gunwales. 

Monday, 5 September 2011

More Epoxy coating this weekend but no new names for the Goat

Both hull sides have now had to coats of epoxy to their internal sides, both sides of the bulkheads have also been given two coats.   I now need to wash off any residue and give them all a sand before a final coat of epoxy is applied to give a good finish.


In other news I have bought a new (previously-loved) and bigger trailer.  The existing dinghy trailer is small and unsuitable for the Goat so will soon be on ebay, the new trailer was a great find online and I am in the process of adding some new hull supports so that it will suit my use.  The trailer is rated for up to 500KG to is more than man-enough for either the Goat or the Pup.


The daggerboard case can now be finished as I have bought some rubber that will be fitted to the front and back of the case to protect the daggerboard from the inevitable groundings.  I’ll post some pics next time.

Tuesday, 30 August 2011

Epoxy coating and names

Following the advice of other Goat builders I am epoxy coating as much as possible before the boat goes 3D as it is much easier on the flat.   I have found that I get the best finish when I apply 2 coats of epoxy wet-on-tack then leave to fully cure, the surface is then washed to remove the amine blush, abraded to a flat surface and then a third and final epoxy coat applied.   This gives a really tough and attractive finish.   I have tried applying three coats on wet-on-tack but the finish always end up being a little rough so although my method is a lot more work it gives a much better finish.  The final epoxy coat will still need abrading before it gets a protective coating of varnish or paint but at least I know the wood is fully encapsulated so it won’t absorb any water.


So far I have applied the first two coats to epoxy to one side of all the bulkheads, the dagger board case and one hull side.   Unfortunately there is only so much room to lay out all the pieces for coating so it is going to be done bit by bit.  Because I am mixing up some larger quantities of epoxy there is a chance that this could heat up in the pot really fast and set before it is used so the tip I learned was to pour the epoxy on the wood before spreading it out quickly with a plastic squeegee or spreader. The epoxy can then be tipped off with a foam roller or brush that leave as an even coating.


The mast was epoxy and glass coated when it was built some months ago but I was never really happy with the finish, I did it on a day when it was warming up and as a result there was some out-gassing of the wood that had left a finish that really is not great and I have been thinking about sanding it all off and recoating ever since.  What had been holding me back is that this is such a waste of time and epoxy but it had been annoying me.  I have now run over it with a sander to clean up the first two coats and I think it will look ok-ish once it had another coat so I think I will leave it as it is for now and get the boat built.  If it continues to annoy I’ll have to take care of it when the boat is built.


My eldest son had been helping me this weekend, he is only 4½ but I’m pleased that he wants to be involved.   We have been discussing names for the boat, I would like a play on the Goat Island Skiff name but he is more interested in Sharks, these are the options we came up with, I’ll let you work out with who came up with each name.


Son of a Goat

Super Shark

Goatee boat

Shark Bite

Goating fast

Sharkey

Goat Afloat

Shark Killer

Vote Goat!


Any suggestions, answers on a post card…..

Sunday, 21 August 2011

Bulkheads, dagger board case and chine logs.

Since my last posting I have manged to snatch a few hours here and there to get some more work done on the goat.  Bulkheads 1 and 4 are now complete apart from fitting a waterproof hatch of some type so that I can get into the buoyancy tank for storage and drying out if necessary.  Below is a pic of the full set, BH1 to Transom (still without a ruder hole or outboard engine cut-out).

The dagger board case has also been cut out and assembled but not finished.  Below you can see the internals of the case having had a couple of coats of epoxy to seal the wood.  I was thinking of adding some glass mat to the inside to add some abrasion resistance but with only 3mm of clearance and final finishing of the dagger board to be done it will be left with just an epoxy coating.  The aft and possibly the front end of the case will have a tough rubbery foam applied so that the dagger board has some degree of protection when we touch the bottom (at speed).

Lastly, the chine logs have been cut down to size and temporally held in position using a few screws to check that the cedar takes the curve with no problems, as it turns out I need not have worried as it is flexible stuff.  A few builders have suggested trimming the inner-top corner of the chine log to lose the sharp edge and remove a potential dirt and water trap, both of which are good reasons to get the router out.  As you can see below the chine logs have a pleasing bevel and I'll hopefully get these glued up this week.


Monday, 1 August 2011

Bulkheads, transom and hull sides.

A great weekend of GIS build progress, it was a shame to waste some excellent sailing weather working on the goat but very satisfying to make excellent progress.  She is such a simple boat to build I’m sure that anyone with the space could knock one together so top marks to Mr Storer for the design.  The hull sides have been cut out, trimmed to shape and joined.


BH2, BH3 and the transom have also been cut out and their framing fitted. BH2 still needs it’s access hole cut as does BH3, however BH3 may stay solid with an additional bulkhead fitted under the seat to make a water-tight compartment for stowage and reducing the amount of water the the boat after a capsize.


Lastly I have also made the stem piece, the instructions were somewhat minimal ("make stem piece") but all the info was available in the diagram and it is good for builders to have to work these things out rather than being spoon-fed instructions.   I wondered about how to make the required shape for a while  as the width changes from top to bottom then attacked the chunk of cedar with a plane to get the required width and then a Surform that made really quick work of shaping.  The Surform made material removal both quick and easy but was surprisingly accurate.   I shaped the stem of the rocking boat using a surform and it really worked well.  Pic below of the stem piece part way through shaping.


Tuesday, 26 July 2011

Fab Foils

Nope, I have not completely disappeared but I have been busy away sailing about 3000 miles in June and catching up with the day-job for the last few weeks.  Now back in the real work of family life and work I am able to put a few hours aside to do some GIS work.  Progress may seem slow but both the Rudder and Dagger board foils have been sheathed in glass and epoxy and looking good.   There are a few blemishes in the rudder blade but I’m not sure yet if these are going to be painted or varnished, seems a shame to cover up the wood but at the same time I am dreaming up all sorts of weird and wonderful colour schemes.


Tuesday, 10 May 2011

Sheathing the daggerboard

Nope, I haven’t fallen off the end of the earth just been busy with family, work and other projects.

I had a bit of time at the weekend and finished shaping the rudder blade having already done the daggerboard, I then got on with sheathing the daggerboard with woven glass mat while also glassing the tip of the rudder.

I found the easiest method was to hang the daggerboard, give it a nice wet coat of epoxy (some of which is absorbed) and then lay the glass on top.  I initially used gloved hand to flatten down then a plastic squeegee.  Having the epoxy soak through the glass can case lots of small micro-bubbles and that can give the coating a milky appearance but this excess epoxy (not much) was removed with the plastic squeegee.  Once the epoxy started to set a second and then a third cost was applied to fill the weave of the cloth.

There is still a little of the weave showing so I will clean up, abrade and apply another coat when sheathing the rudder.


Not sure how much time I will have over the next two months but will try and put a bit of time in as and when I can.

Thursday, 10 February 2011

A (e)pox(y) on your house…

The weather was just about warm enough to do some work with epoxy this weekend and the mast was the first to be worked on. The tip of the mast required a collar of glass mat to give it a little extra strength and likewise the base of the mast is glass-sheathed for the bottom 1200mm, fortunately I had some suitable woven glass mat left over from a previous project. The glassing of the mast was done first with the rest of the mast being given a coating all over. The end-grain at the top and bottom ends of the mast received a few coats of epoxy as it soaked in quickly.


While the first cost on the mast was left to set the dagger board was next as it required a layer of glass over the bottom end of the board before the sides are also epoxy-glass sheathed. The end grain of the cedar soaked up the epoxy even more than the Doug-Fir of the mast and it had at least four coats before I could attempt putting the glass on. Both the mast and the dagger board tip were later given a second coat of epoxy so that all the glass mat was filled . With the epoxy on the mast set hard it is looking good, I will probably run the sander over it as there are a few little lumps and runs that need flatting down before a final coat of epoxy is applied and then varnish for UV protection.


As it was warm I also made up the cedar and oak blank for the rudder, if I can get this shaped to size over the coming week it will make sense to epoxy sheath the rudder and dagger board at the same time. I’m hoping to sheath both sides in one operation if possible but I’m still trying to work out the best way of doing this without drilling screw holes to suspend them. Any ideas?


I have marked out some of the bulkheads on a sheet of ply so at some point I’m going to have to do a cutting out session with the jigsaw. Fortunately the designed suggests a good way of laying out the parts to make the most of the plywood and that saves a bit of thinking time. I have also had a measure of the “bendy yard” (as I am now calling it), it looks like I may have been a little over zealous with the plane when shaping it as the yard is approx 2mm too thin along most of its length. I suspect that this, along with some slightly more bendy than normal Fir is to blame for the yard being to flexible.

Monday, 31 January 2011

Yard and Daggerboard work

Another weekend has come and gone allowing time for some high-quality wood butchery!

So that a start can be made on some of the hull panels I cleared some space in the front room and brought through two of the Plywood sheets (yes, I do have an very understanding and long-suffering wife) so that I can mark out one of the hull sides. A series of lines are drawn on the two sheets at 300mm intervals and on these lines marks are made to show the position of the top and bottom of the hull side. The designers method of hammering pins into these points and then bending the faring batten around the pins was a really good way of ensuring a fare shape was drawn onto the ply, it was also really clear where a nail was not quite in the correct position.


Drawing the side panels

The yard had already been planed down to a taper but was still square in section, in order to make it round I needed to make a spar-gauge, this is a tool that helps mark-up a square spar so that it can be planned to an almost round shape. In true wood-butcher style I made one with the best “trial-and-error” method and the Mark 6 spar-gauge worked reasonably well and allowed me to plane down the yard to an tapered octagon shape. The yard was then planed to a 16 sided shape freehand and we have ended up with an almost round spar, I just need some long lengths of sandpaper to round off the final edges. The yard is surprisingly bendy, it is designed to be bendy but I need to measure this flexibility against some existing flex data recorded on the designers website. The sail will be cut to reflect the amount of flex in the yard but I don’t want to to be so flexible that the lightest of gusts means that I lose sail shape. If there is too much flex I may have to think again about the use of carbon fibre tube for the spars (but using the wooden mast).

Spar Gauge

The final job of the day was to continue with the dagger board, the blank had been laminated but this needed cleaning up and thicknessing to 22mm. As I don’t have a thicknessing machine this was done with my latest ebay purchase, a large No6 bench plane. The cedar is relatively soft and easy to plane but the oak that was chosen for the leading and trailing edge of the dagger board was very hard work even with a freshly sharpened blade. While playing games of hide-and-seek with my eldest son I slowly get the blank pleasingly flat and to the required thickness. The shape of the dagger board was then drawn on the blank and cut out with a jigsaw. Next I need to make up the designers foil profile template so that a sweet profile can be planned into the dagger board.


Daggerboard with mast and yard behind


Monday, 24 January 2011

Mast and Yard wait for no man....

This weekend the progress had not been quite as quick as the previous weekend, however the mast is now pretty much complete. The edges of the mast have be under the router to round them off and I have filled the few nicks I made in the wood while building. The mast just needs some glass around the bottom end and a coat of Epoxy all over to seal. I have started shaping the yard that has a taper at both ends but there is still quite a bit of work to get this completed, probably another couple of evenings.

I have just been reading on the Storer Boats forum about a couple of GIS owners than have had a Carbon Fibre rig made that has resulted in a big weight saving aloft. While the racer me would like to have a carbon rig it does go slightly against the idea of a simple to build and relatively cheap boat. I believe that she will sail well with the standard rig I am building but it would be interesting to have some boat-on-boat tuning time to see how well the various tweaks and changes work in the real world.

Monday, 17 January 2011

Lots of wood shavings and a three sided mast

A satisfying and successful weekend of wood-butchery has just passed and a decent first step has been made into the building of this Goat Island Skiff. I also made piles of wood shavings and ended up taking a few pics, some of the shavings look like rose flowers.


Friday night was spent marking out the narrow staves for the hollow Douglass Fir mast, these were then planed down as necessary to give the mast its taper. The instructions suggest doing each stave individually but as the planks I have are nice and straight I planed them down together giving me two identical staves and lots of shavings to sweep up. Some time on Saturday allowed me to make the blocks that are internal to the mast and hold the staves apart at the correct distance, one long block at the bottom with small spacers running up the inside of the mast. The spacer blocks were all made from lightweight Cedar.

Finally the time came to glue it all together so I applied packing tape to one of the wide staves to act as a support for the first gluing operation. The ladder of narrow staves and blocks were laid out and clamps were all found before the epoxy was mixed up and thickened. Starting at the bottom of the mast the epoxy was applied and then clamped before moving from one spacer block to the next until the top of the mast had been glued and clamped.


As I was in an “epoxying” mood and it was reasonably warm (for the time of year) I decided to glue up the cedar blank that the daggerboard will be made from. This was 7 lengths of Cedar with an length of Oak along the leading and trailing edges. I fortunately have a nice flat table that makes a good platform for this so it was covered in packing tape before the wood was glued and clamped to the table.


I had a few hours available on Sunday so started by inspecting the mast and daggerboard now that the epoxy had all hardened. The daggerboard blank was fine and I cleaned up the surface of the board with a plane and sandpaper. The mast also looks good but did have a slight bend toward the top, fortunately the bend was to the side and this can be corrected once the narrow staves are glued up to the wider staves so this was tackled next.

A straight line was marked along the first wide stave by using a stretched string, I was then able to use this as a base line when gluing the narrow staves to it. A lot of epoxy was needed for this job and much of this was squeezes out, a bit of a waste really but I would rather this than end up with areas with little or no glue. A lot of clamps were required to keep it all in alignment and the designers tip of using packing tape works well. There were a couple of places where I struggles to keep the mast straight so I used a few temporary screws to hold the narrow stave in position while it all set. The screws will be removed and holes filled before the final wide stave is glues in position. The final result is pretty straight mast (or at least three sides of it).


Friday, 14 January 2011

To quote Mr. R Harris “can you tell what it is yet?”

The wood-butcher workshop has had a rather large delivery of materials. Six sheets of Plywood have arrived along with lots of Doug Fir, Western Red Cedar and some White Oak, in fact everything a prospective GIS builder could wish for. I have cheated a little bit and had all the wood pre-machined to the correct size and it took quite some time to check through the delivery to ensure that everything was there. One day I will have the workshop equipment to prepare all the materials myself but until then I have great confidence in Robins Timber to supply what I need planned exactly down to size.

It was actually rather daunting looking at all the virgin materials and thinking where to start; I recall a similar feeling before starting Naughty Note but a lot of sawdust has been swept off the floor since then. I know now that by breaking the build down into lots of easy steps the bigger piece of work soon comes together.

I plan to start by building the hollow mast first followed by foils and centreboard case as these are all items that will be required during the hull build so it makes sense to start with them and not hold up the build later. The boom and yard will probably wait until I am closer to the finish as I have some decisions to make about the sail, how much bend I want in the yard and how I’m going to reef the sail, so there is plenty to mull-over while cracking on with the build.

As before, no time limit has been set for the project, with a young family and sailing events this year spare time will be hard to come by so I doubt it will be launched in 2011. The flip side of this is that the longer the build the more time there is to get the name right, as we all know, that is crucial!

Earlier this week I decided to make a little model of the Goat. As you can see from the pics it is a little “rough and ready” so I should have spent a little more time concentrating on this rather than watching a film but it gives me a nice idea of the shape in 3D and even Mrs Wood-butcher agreed that the GIS has nice lines.

Monday, 10 January 2011

Sailing Naughty Note

The eldest son and I have been out for a sail on Naughty Note this weekend, only her second time on the water! The occasion was a meeting on the UK HBBR (Home Built Boat Rally), numbers attending were a little low as you may expect for a boating rally in January but there were four boats on the water at Dell Quay, Chichester and it was very nice to meet a few of the friendly members.

Initially when setting off on NN I thought I had forgotten how to sail as we crabbed sidewise almost as fast as we were going forward, the daggerboard was down but the leeway was shocking. After a few tacks it started coming back to me and a bit more breeze helped. I found that if you over sheet the sail the boat just seems to stall and slow, I found that keeping the end of the boom just over the corners of the transom gave a good compromise between speed and pointing. A couple of times she struggled to tack until I released the mainsheet, if felt like the CoE was a little too far forward although this was less of a problem when travelling at speed.

I have not changed the setup at all since NN's first sail some time ago and the boat really needs a kicker to control the twist of the sail as when reaching and running the boom goes far to high and a lot of power is lost due to too much twist.

While I was initially disappointed with her performance once I had tuned myself into the boat she was actually good fun and will be a nice stable platform for the boys to learn in. I’m quite keen to try her out in a bit more wind at some point but need step the mast in the front garden and rig a kicker before any more trips out.
Pic taken by Mrs. Wood-Butcher from the warmth of the pub.

Nice link to another blog with pics from yesterday….

Wednesday, 22 December 2010

Goat Island Skiff

Over the last few months I have been putting a lot of thought into what, if anything, I am going to build next. Whatever I build it needs to be or real value to both myself and the family, it must also offer something different to the sailing that we already do. I really like the idea of a small trailer sailor, ideally gaff-rigged with an easily driven hull, it would also have to offer cosy accommodation for 2-4 people for the odd long weekend away. Being able to drive to a new cruising ground and then go exploring for a long weekend sounds like fun and with the time restrictions of work and family it would offer more options than cruising a larger boat. Designs that I have looked at seriously include the Dudley Dix Cape Henry and Cape Cutter and the Selway Fisher Evening/White Swan. The Problems with these are time for the build, space for the build and also cost. Once I had weighed up all the factors a decision was made that the trailer-sailor build would be postponed for the time being and an alternative project investigated.


I have been very interested to read about UK RAID events and Raiding in general. There was the first Solent Raid this year (http://www.raidengland.org/) that looked great fun, the Scottish raid appeals even more as you travel from the East to West coast (http://www.sailcaledonia.org/). One of the boats that completed Sail Caledonia this year (2010) was a Goat Island Skiff designed but Michael Storer in Australia. My initial thoughts where that this is a pretty boat and of a size to make it suitable for single and two-handed sailing as well as being a relatively stable platform to load up with gear and take the kids sailing if suitably reefed for the conditions. I had some reservations about some aspects of the design such as the flat bottom and Lug rig but there were more down to my lack of understanding than a technical problem with the design and having had some conversations with the designer and reading lots of information about the boat I have come to the conclusion that the GIS is actually a very clever design.

In a nutshell, the GIS is a very light weight, traditional Australian skiff with a large balanced Lugsail. She has an easily driven hull and will outperform most “Character” boats of a similar size yet has the load carrying capacity to be used as a family or carry enough gear to go camp-cruising or Raiding. From what I have read the goals of the designer were to have a performant and pretty design that is relatively cheap to build and fun to sail, all the reports and videos that I have seen show that this brief was exceeded.

The GIS is 15ft 6” in length with a Beam of 5ft. The hull should weigh around 125lbs (depending on how it is built) and the rig has an impressive sail area of 105 sq ft (9.75 sq meters) although the sail is designed to have two reefing positions. As a comparison to a well known design, the Laser sailing dinghy is 13ft 6” (2ft shorter), weighs in at 130lbs (heavier than a GIS) and has a sail area of 76 sq feet (29 sq ft less than the GIS). All this adds up to a light boat with great performance. I have been reading quite a lot about the intricacies of the balanced Lug rig and how is it designed to bend and flex to absorb the energy of gusts, it is all very interesting stuff and I look forward to playing with it once the boat is afloat.

So here it is, the next build is going to be a Goat Island Skiff and below is a picture of the designer putting a GIS through its paces in a good breeze…


Michael Storer sailing a GIS, Pic by Peter Hyndman

Here is a great pic of a UK GIS called Blanche..

Mark Sailing Blanche, Pic by Chris Perkins

Wednesday, 15 December 2010

Finished, just in time for Christmas

Finally finished off the painting on the rocker last night. The hardest bit has been painting the waves as I'm not particularly artistic and it was frustrating for me, however if you don't get too close the waves give the effect I was looking for and I'm sure for a toddler it will be just fine.

I just need to give it a few days to harden off before it is wrapped up in Christmas paper


Thursday, 2 December 2010

The rockers and cross-beams have been glued together and thickened epoxy fillets added on all the visible joins to make it neat and give additional strength. Lots of primer and rubbing down followed on both the rockers and the hull before the two parts were screwed together, again thickened epoxy fillets are used on the visible joints.


The picture shows the rocking boat complete with the first top coat of paint applied to the inside. The colour scheme will be based on the Pup dinghy, Blue on the outside and Ivory on the inside (both International Toplac). Blakes Classic varnish will be used on the brightwork with red along the bottom of the hull to look like antifouling paint. The rockers will be more tricky to paint and will use two lighter shades of blue with some white detailing to make them look like breaking waves (hopefully).

Friday, 12 November 2010

The Rockers Rock!

The rockers have been cut out (quite a job with a dodgy old jigsaw) and all the bits trial fitted together. The cross pieces need some additional shaping to get the hull fitting snugly but it is starting to look very nice, in fact it rocks!

Friday, 5 November 2010

The pics below show some progress on the hull of the rocking boat, inner and outer gunwales have been fitted along with a handle for the captain. A coat of wood primer has been applied to the hull and seat with coat of varnish on what will be the brightwork.

The shape for the rockers has been marked out ready to cut, I could really do with a band saw to do this but as a dedicated wood-butcher without the correct tools I will be making do with a jigsaw. The rockers are 1.5"thick so it is going to be a struggle for my little jigsaw but if I go slowly with a new blade it should be possible. Fingers crossed.